What are They?
Anchor rows serve as "place holders" for target application data which won't actually be available until the macro runs. Anchor rows are provided immediately above the Formulas row, each text-triggered formula row, and the Sandbox rows. They are most often used for letting a formula refer to data on the "prior" row when the macro runs.
| You can enter numbers and text in anchor row cells, to help with testing formulas that refer to those cells. |
| You may not enter formulas in anchor row cells. If you do, they will be flagged with an orange (error) background color. |
Where are They?
I don't see them...where are they?
You won't need anchor rows all of the time—and some people may never need them—so they are hidden by default. You can show or hide them by using the [ A ] button menu in the Editing toolbar.
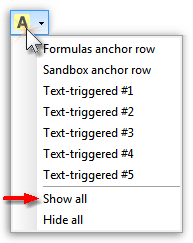
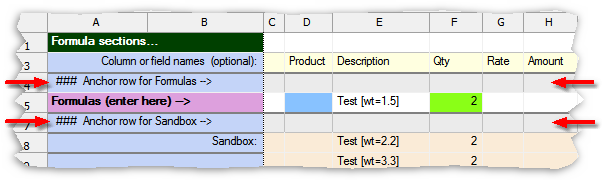
To see where anchor rows are located, click the Show all item in the [ A ] button menu. Here is a partial screenshot of a macro worksheet showing some of the anchor rows:
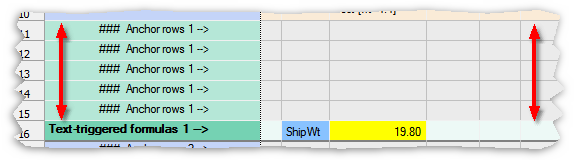
Text-triggered formula rows each have five anchor rows. This is to support the mini-spreadsheet feature, an advanced feature for doing calculations involving data from multiple rows of the target form.
How Do I Use Anchor Rows?
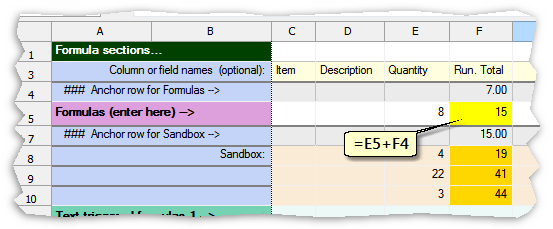
A common use is in formulas which compute a running total or other calculation involving data from the "prior" row of the target form.
Here's an example of how to calculate a running total. The formula on the Formulas row adds the prior row's running total (from the anchor row) to the current row's Quantity. Sample data entered on the Formula and Sandbox anchor rows helps to demonstrate how the running total works.
| You can enter or change sample data on anchor rows any time, to see how your formulas work with different data. |
A more advanced use of anchor rows is in building formulas which refer to several prior rows of data on the target form, known as the mini-spreadsheet feature.