This example demonstrates:
•Using text functions to build a customer message containing a discount amount
•Using text functions to include a discount deadline based on the Invoice date, in the customer message
•Referencing a header field (Invoice date) in formulas
•Using trigger Items to control where calculations occur
| Part 2 extends this example, adding an "indicator column" to limit the discount to specific Items on the form |
How to Build a Custom Message Based on the Invoice Date
Overview
Skyview Farm Service supplies agricultural chemicals, fertilizer, and other crop production supplies to farmers in the surrounding area. The amount they borrow on an operating credit line at the bank grows incredibly large during the busy part of the cropping season. During that time their sales volume is high, the products they sell are expensive, and Accounts Receivable collections are particularly slow—partly because their customers (farmers) are very busy then too. Fertilizer, especially, puts a big burden on their borrowing needs. Skyview often carries a balance of up to $250,000 in Accounts Receivable for fertilizer alone in the busiest months.
To reduce the lofty amounts of operating credit they need, manager Jerry Swartz has decided to try to improve cash flow by offering a 2% discount on all invoices paid within 10 days, during the busy months of April, May, and June.
But Jerry managed another farm supply business in the past and, in his opinion, only putting the discount terms at the top of the invoice—as "2% 10 net 30"—is not very effective. Many customers fail to take advantage of the discount, because the deadline date is unclear and the amount they could save by paying early is not very apparent. So Jerry wants Skyview's invoices to have a message at the bottom which clearly spells out the discount amount and deadline date, something like this:
*** DISCOUNT of $123.45 if paid by 11/14/2013 ***
This is something you can do for Jerry, with FormCalc SST.
QuickBooks Setup
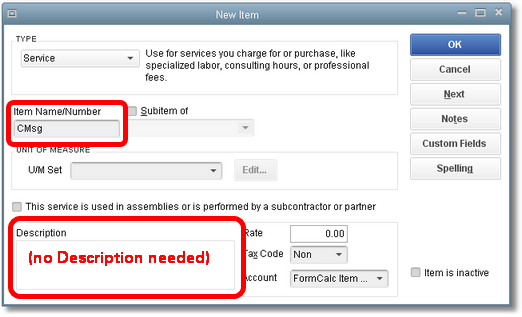
1.Add an Item to the Items list, to use as a trigger Item.
| The placement of this Item on invoices will determine where FormCalc SST displays the discount message. Give the Item a name which reminds you of its purpose, such as CMsg (for customer message). You can leave the Description field empty, because FormCalc SST will supply that during form processing. |
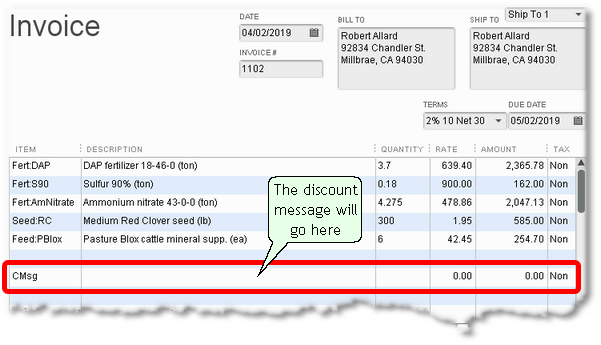
2.Open the Invoice form, and fill it out as you normally would.
| Select a Customer, and put at least three Item lines on the form as sample data for FormCalc SST to copy when taking a snapshot of the form. In this example we've included the CMsg Item just to illustrate where it will go in the Invoice, though we didn't really need to include it for taking the snapshot. |
FormCalc SST Setup
1.Select File > New from the main menu to start a new FormCalc SST file.
| (Optional. You may overwrite the existing file if you want.) |
2.Take a snapshot of the QuickBooks form.
| FormCalc SST will gather data about the form and build a spreadsheet based on it. |
3.Assign column types on the Column types row, to identify the spreadsheet's column types with their corresponding QuickBooks columns.
| The column types row should look something like this: |

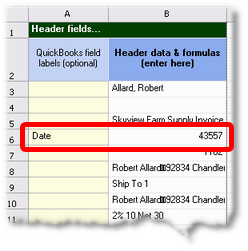
4.In the Header section, find and label the Date (invoice date) field.
| The reason for finding and labeling the Date field is to be sure you've identified the correct field before entering a formula which refers to it. (Labeling the field is optional but can prevent making mistakes later.) |
| The Date field's contents probably won't be what you expect. As you can see below, dates come into FormCalc SST expressed as numbers. This may be confusing at first, but it is what is what allows spreadsheets to use dates in calculations. (In the next step you will format the number as a date.) |
5.Format the Date field's cell as a date.
| Right-click on it (the cell containing the number, not the "Date" label), then select Format from the pop-up menu. The Format data or results window will open, where you can select a date format as shown here. |
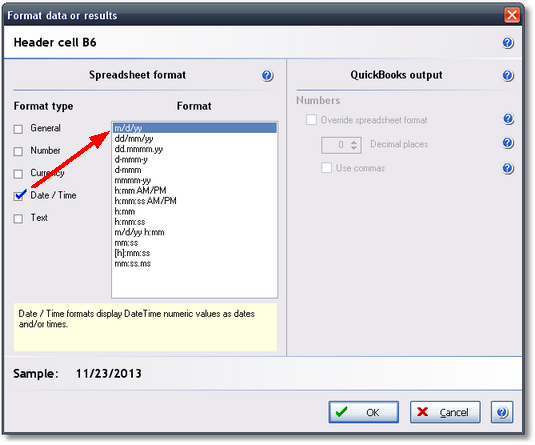
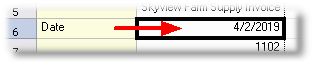
| When you are done the date cell should be formatted to look like this: |
6.On the Item-triggered formulas 1 row, enter the trigger item's name in the Item column, and this formula in the Description column:
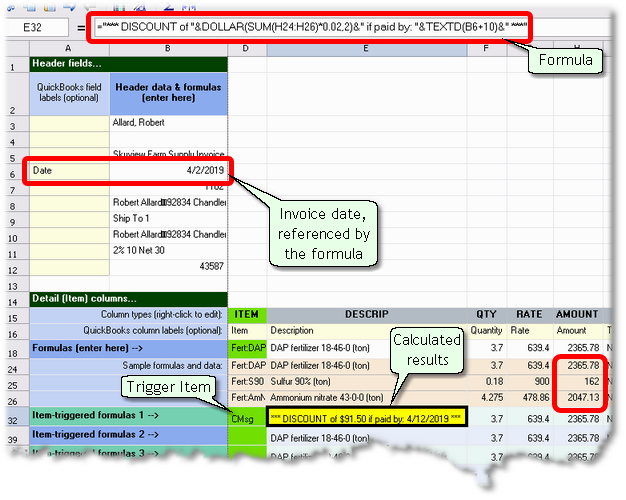
="*** DISCOUNT of "&DOLLAR(SUM(H24:H26)*0.02,2)&" if paid by: "&TEXTD(B6+10)&" ***"
| This screenshot shows the formula, calculated results, and trigger item as entered on the snapshot sheet. |
| Here's the formula again. |
="*** DISCOUNT of "&DOLLAR(SUM(H24:H26)*0.02,2)&" if paid by: "&TEXTD(B6+10)&" ***"
| Let's break it down to see how it works: |
Every formula begins with an equal sign (=). |
|
"*** DISCOUNT of " |
The first part of the text we want on the line. |
& |
Joins two text strings together |
DOLLAR( ) |
The Dollar() function formats a number as currency, using the number of decimal places you specify. |
SUM(H24:H26) |
The SUM() function sums a range of cells. SUM(H24:H26) refers to the entire range of sample rows in the Amount column, which is "shorthand" that tells FormCalc SST to sum the entire column when a QuickBooks form is actually being processed. |
*0.02 |
Multiplies the SUM(H24:H26) result by 0.02 to calculate the 2% discount Skyview will be offering. |
,2 |
Tells the Dollar() function how many decimal places to use. |
& |
Joins two text strings. |
" if paid by: " |
More text we want on the line |
& |
Joins two text strings. |
TEXTD(B6+10) |
Takes the date/time value from cell B6 (the Invoice date field from the form's header), adds 10 days to it, and formats the result as a text string date. |
&" ***" |
Joins the last piece of text to the line. |
7.Save the file to assure your changes are kept.

| FormCalc SST files are identifiable by their .SST filename extension (.SST in prior versions). |
Processing a QuickBooks Form
To verify that your FormCalc SST setup works as desired, process a QuickBooks form containing some data.
From FormCalc SST
1.Press the Action button in the main toolbar.

| The focus will switch to QuickBooks, and the Choose an action dialog will appear: |
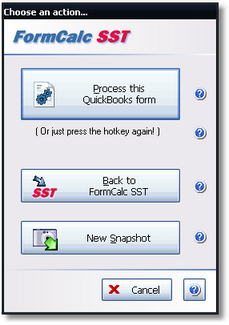
2.Click on the Process this QuickBooks form button to process the form. (See example results below.)
From QuickBooks
1.Press the FormCalc SST hotkey, which is F11 unless you have changed it in Preferences.
The same Choose an action dialog as shown above will appear.
2.Process the form by either pressing the hotkey a second time (quickest for most users), or clicking on the Process the QuickBooks form button.
Results
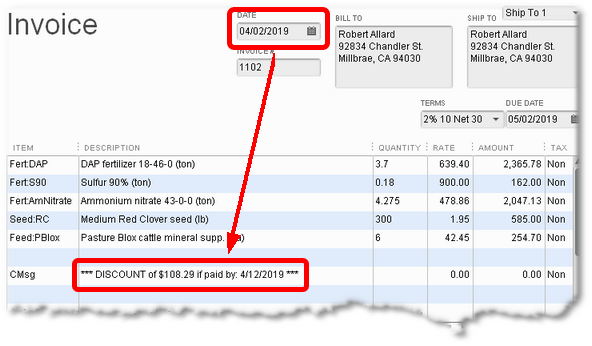
The form should look something like the following after it has been processed. Compare the invoice date with the message date, and you'll see that the message is 10 days later. Also, the discount amount has been calculated correctly as 2% of the Amount column.
| If the dates below seem odd it's because the example is based on one of QuickBooks' sample company files, where all dates are future dates. |
| When you save a QuickBooks form, the FormCalc SST-calculated results are saved with it. Other QuickBooks users who view the form will be able to see the calculated results even if they don't have FormCalc SST on their computer. |
But then Jerry says, "Wait a minute..."
"I only want the discount to apply to the fertilizer Items, not to everything on the Invoice."
You think "Well then why didn't you mention that?" but you say "No problem...it'll just take a bit more setup work." You will need to add a custom field to the Items list, add a couple columns to the Invoice, and make some formula changes...all of which are described in Part 2 of this example.
Related topics: