This example demonstrates:
•Why you may want to use custom fields
•How to add custom fields to a Customer, Vendor, or Item list
•How to populate custom fields with data
Why Use Custom Fields?
Defining custom fields in QuickBooks lists (the Item list, Customer list, or Vendor list) has at least two benefits:
1.They make more fields available on your forms (via form customization)—more places for holding data and calculated results.
2.They let you individualize forms for each Item, Customer, or Vendor. Data specific to an Item, Customer, or Vendor is automatically pulled into custom fields on a form when you select from those lists, and that data can be used in FormCalc SST formulas to customize the form's text, messages, or calculated results.
Adding Custom Fields to a List
Item list
1.Open the Item list by choosing Lists > Item list from the QuickBooks main menu.
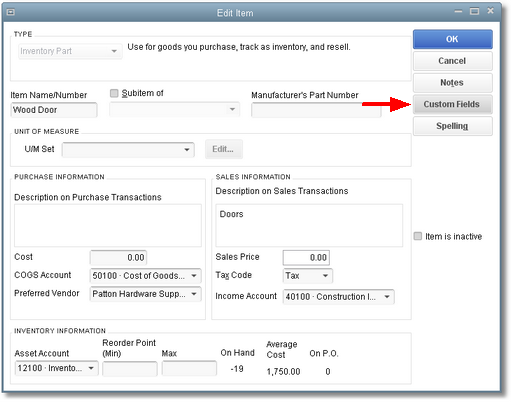
2.Select an Item to edit and open the Edit Item window.
| To do this, click on the Item you want to edit, then choose Edit Item from the Item button's menu at the bottom of the Item list window. |
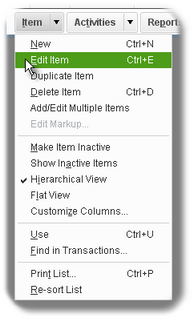
| The Edit Item window will open. |
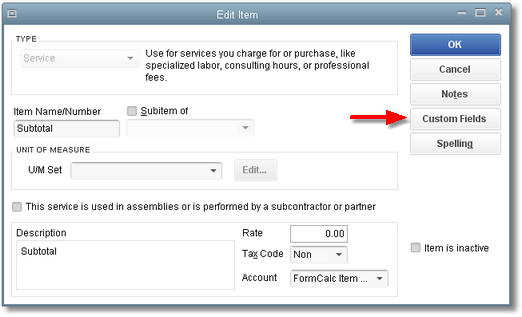
3.Click on the Custom Fields button.
| The Custom fields dialog will open. |
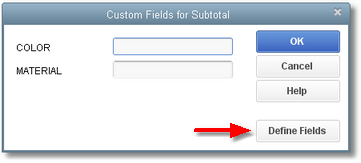
4.Click on the Define Fields button.
| The Set up Custom Fields for Items dialog will open. |
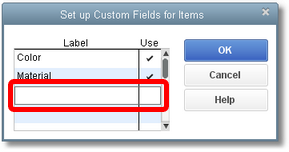
5.Add one or more custom field names to the list.
| Custom fields you add here are added to all Items, not just the one you are currently editing. |
6.Click OK to close the dialog.
Customers or Vendors
The steps for defining custom fields in the Customers list and Vendors list are the same. Here are steps for the Customers list.
1.Open the Customer Center by selecting Customers > Customer Center from the QuickBooks main menu.
2.Edit a customer by right-clicking on a customer name in the left pane, then selecting Edit Customer:Job from the pop-up menu.
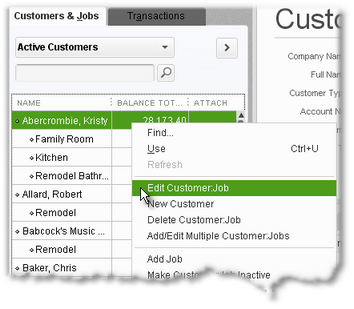
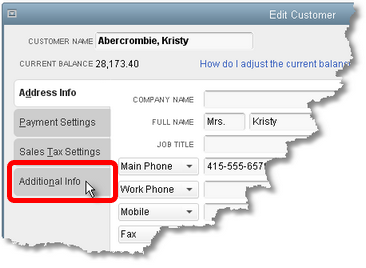
| The Edit Customer window will open. |
3.Click on the Additional Info tab of the Edit Customer window.
4.On the Additional Info tab, click on the Define Fields button.
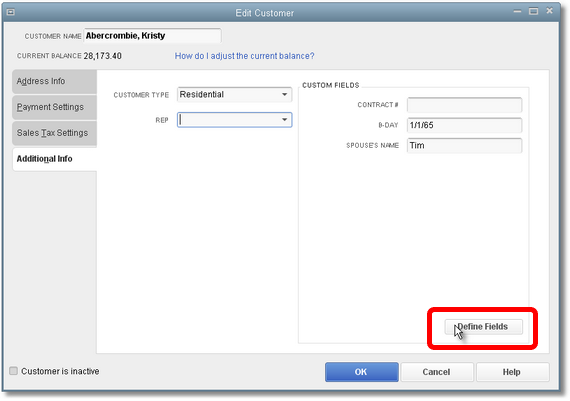
| The Set up Custom Fields for Names window will open. |
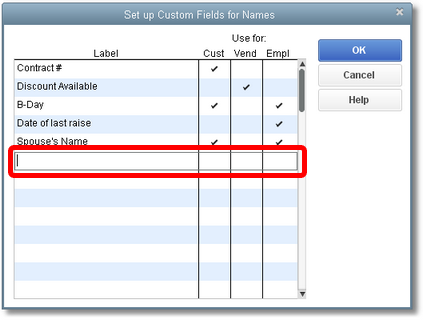
5.Add one or more custom field names to the list.
| Custom fields you add here are added to all Customers, not just the one you are currently editing. |
6.Click OK to close the dialog.f
Populating Custom Fields (Adding Data)
To be useful for calculations on QuickBooks forms, custom fields need to contain data.
Here are the steps for adding data to custom fields in the Items list. (The steps are basically identical if you are working with the Customer list or Vendor list.)
1.Open the Item list.
| Choose Lists > Item list from the QuickBooks main menu. |
2.Select an Item to edit and open the Edit Item window.
| To do this, click on the Item you want to edit, then choose Edit Item from the Item button's menu at the bottom of the Item list window. |
| The Edit Item window will open. |
3.Click on the Custom Fields button.
| The Custom fields dialog will open. |
4.Enter data for any or all of the custom fields, as appropriate for the Item.
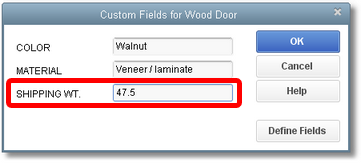
5.Click OK to close the Custom fields dialog.
6.Repeat these steps for all Items which need data in their custom fields.
Including Custom Fields in a Form
After defining a custom field and populating it with data, you still have to include it in a QuickBooks form to make the data available to FormCalc SST formulas. To do that, follow the steps in Customizing QuickBooks forms for FormCalc SST.
Notes:
•Customer list and Vendor list custom fields can only be included in the form's header. (They are available on the Header tab of the Additional Customization window.)
•Item list custom fields can only be included in the form's Detail (columns) area. (They are available on the Columns tab of the Additional Customization window.)
| Any time you change a QuickBooks form's layout you will need to take a new snapshot of the form, so that FormCalc SST's Snapshot page matches the new layout. |
|
FormCalc SST makes custom fields more useful!With QuickBooks alone, custom fields mostly hold descriptive information. If you had Items representing shoe inventories, custom fields might hold shoe color, style code, or sales category (dress, casual, running, etc.) for display on invoices and purchase orders. But with FormCalc SST custom fields can hold data, not just information. When you select a Customer, Vendor, or Item on a form, custom fields on the form can automatically pull in Customer-, Vendor-, or Item-specific data which FormCalc SST can use to customize the form's text, messages, or calculated results. |
||||||||||||||||||
|
|||||||||||||||||||
