Navigation:  Quick Start Tutorials >

8. Creating and printing a report

Print this Topic Previous pageReturn to chapter overviewNext page


In this topic:


Reports, of course, are where the real benefits of ManagePLUS lie. This topic describes the basics of creating ManagePLUS reports, including changing their layout and formatting, and printing them to a printer.

Creating a report

1.Choose a report from the Reports item in the ManagePLUS main menu.
Usually this requires selecting menu items from several submenu levels. The first level selects a basic report type, and subsequent levels select other report specifications. The following example shows how to select a Profit & Loss, with Classes report for the active accounting period, with a separate report column for each month in the period:

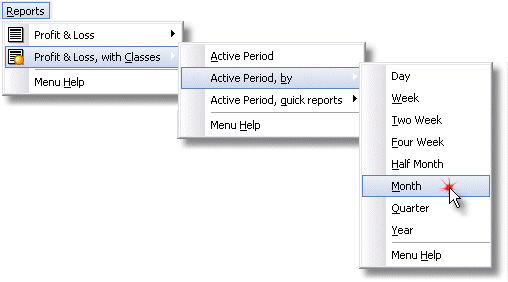
As new versions of ManagePLUS are released, the layout of the Reports menu is likely to change and may not be exactly as shown here. Refer to the Main Menu Reference for details on the current menu layout.
ManagePLUS will build the report in a new report window.
2.Review the report.
Besides scrolling through the report to view the results, you can:
Change report layout
Change report appearance (formatting)
Preview and/or print it to a printer
These are described below, in other sections of this topic:

Changing the report layout

The Modify Report dialog lets you change things like the report's layout, titles, and other features. In this example we will use it to choose which columns are displayed on the report.

1.Click the Modify button in the report window's toolbar.

The Modify Report dialog will open.

2.On the Layout tab, choose the columns you want in the report.
Check mark the column types you want on the report, and uncheck those you don't want.

Usually you won't need all of the available report columns.
 

Reducing the number of columns makes reports more readable and easier to fit on a page when printed.
 
After just a bit of experimentation, you will learn which column types you normally want in your reports.


3.Click OK to close the Modify Report dialog.
ManagePLUS will update the report.
4.Notice the report changes.
The columns you check marked are now included in the report; the ones you unchecked are gone.
Experiment with other items in the Modify Report dialog to see how they affect report layout.

Changing report formatting

ManagePLUS lets you change the formatting (font type, size, color, etc.) for various report styles. Think of a style as a collection of the various formatting attributes (font type, size, color, etc.) which controls the appearance of a specific part of a reportrelated columns or rows, or even a single cell.

Here's how to edit report styles:

1.Click in a cell of the report spreadsheet where you'd like to change the formatting.

Selecting a cell indicates the block of cellsthe group of columns and/or rows—for which you want to change formatting. Normally all cells in a column and all cells in a row are formatted alike. (This is also true for groups of related columns or rows.) There are exceptions, but you'll easily recognize those as you experiment with formatting.

Here's an illustration of the column and row blocks to which a selected cell may belong:

The cell is in the Total $ column and also in a block of Classes rows. Also notice that the cell is highlighted in a different color, which means it is one of the spreadsheet's editable cells. Each of these reports elements (Total $ column, Classes block, and editable cells) has a different style associated with it; and so, can have different formatting.
2.Click on the Format menu button to see the available formatting commands.

The cell you selected in step 1 determines which styles editing commands are present in the menu: only styles related to that cell are listed for editing.

Besides the Format button, here's another way to get to the formatting menu: right-click in any cell of a report to display a pop-up menu which includes the style editing commands appropriate for that cell.
3.Select the style you want to change.
Let's change formatting of the "Total $" column style.

The Edit Report Style dialog will open.

Not all style attributes are editable for all styles. Whenever a style attribute isn't editable, or is editable but has no effect on the report's appearance, that means the attribute is controlled by some other style. For example, the background color of certain row styles overrides the background color of styles for columns which intersect those rows.
4.Make desired formatting changes in the Edit Report Style dialog.

       For example, change the font:

5.Click OK to close the Edit Report Style dialog.

       ManagePLUS reformats the Total $ column using the new font.

Previewing and printing reports

1.Select an area of the report to print.
To print the entire report, you don't need to select anything.
To print just part of the report, select the rectangle of cells to print:
Click in the upper-left cell of the rectangle and,
While holding down the mouse button, drag the mouse to the lower-right cell of the rectangle, and then,
Let up the mouse button.
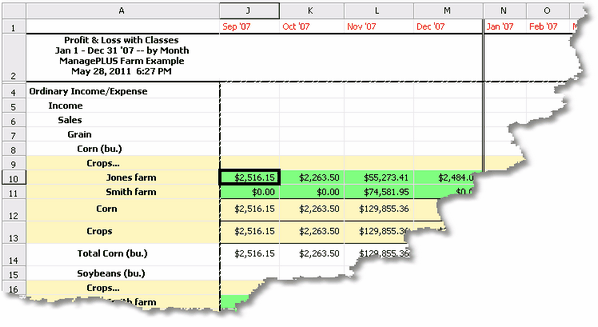
When you're done, the rectangle should be highlighted as shown below. (You can highlight a much larger area than the screen of course; this is just an example for illustration purposes.)

2.Choose a print command from the Print button menu.
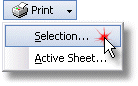
To print the entire report, choose Active Sheet...
To print just part of the report (i.e., if you selected a rectangle of cells in step 1), choose
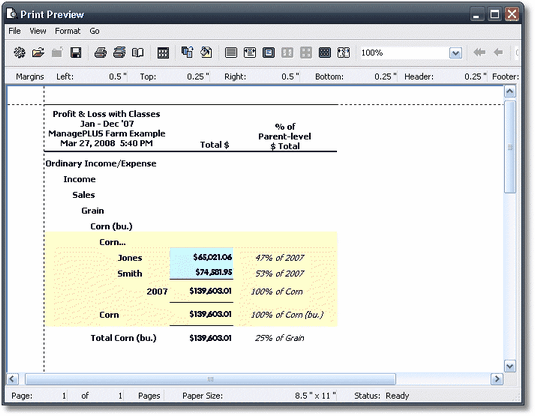
 Selection...
The Print dialog will open.

3.(Optional.) Click on the Preview button to preview the report.
The Print Preview dialog will open. There, you can see exactly how the report will look when printed. You can also use the buttons at the top of the window to change print layout (margins, etc.), printer setup, and so on, and also to send the report to your printer.

When you're done working in the Print Preview dialog, you can close it with the Close button at the right end of the toolbar:
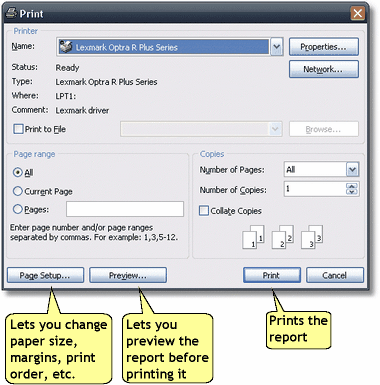
4.To print the report without previewing it, click on the Print button in the Print dialog.

The report will print to your printer.

See also:

Exporting reports to Microsoft Excel

Using reports for "what-if" analysis


Page url: http://www.goflagship.com/help/mp/index.html?qs_report.htm